

You’re tasked with creating a custom Word document from data in the CDS, where do you start? How do you change the data in the Word document? Well this blog post will show you how to generate a Word document invoice from a template and use Microsoft’s own connectors to solve the problem. We will also take a look at making a PDF from the document too with no third-party costs/data issues involved.
Firstly, we’re going to need four things.
So, we need Microsoft Word installed, why? Well we need Word as we’re going to generate a Microsoft Word Template on our system. This will allow use to create a template that we can pass information into on Power Automate, so let’s start there.
If you’ve never made a Word Template before you will need to enable the developer features. To do this follow the steps below:

You have now enabled the developer options on your ribbon!
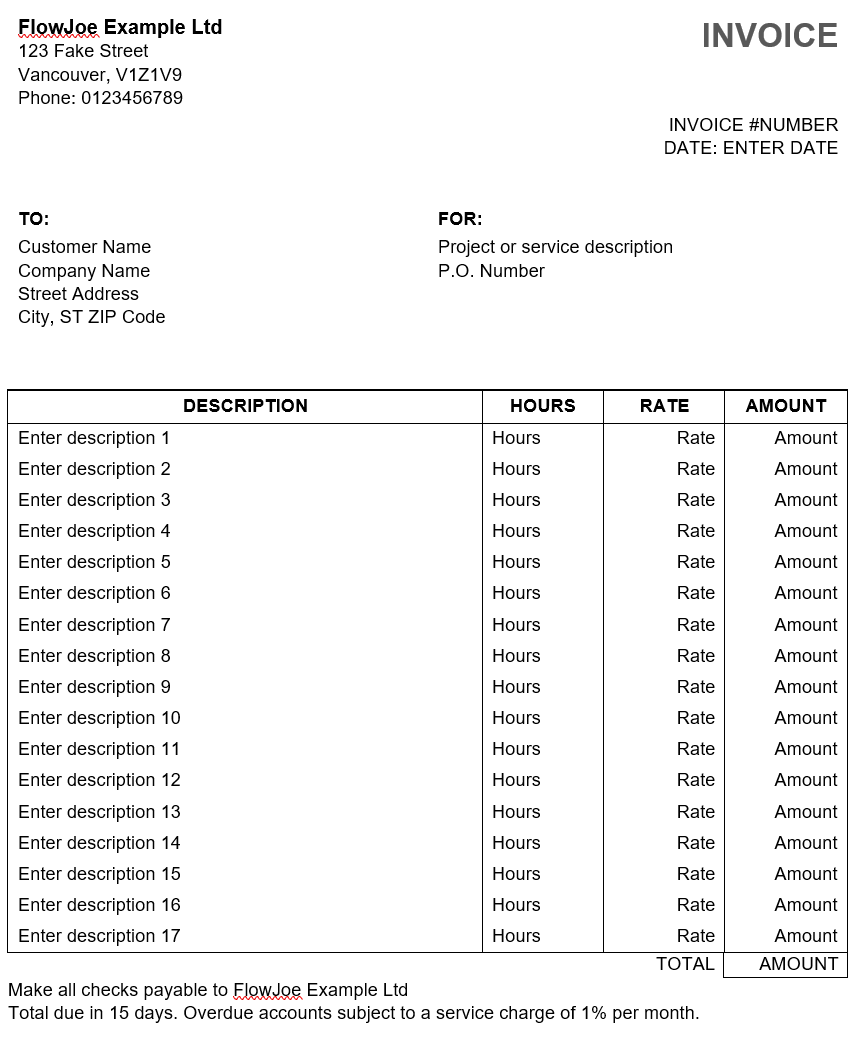
From here we can now design our Word Template, essentially, we’re just making an invoice in word at the moment. I use tables to separate content easier and I suggest you doing the same. Use dummy-data to create a mock invoice (see below as an example).
Now we have an example of our invoice we want to open the developer tab. We want to replace the dummy data with plain-text-content controls. You can see the control highlighted below and an example of what it looks like when you insert it:
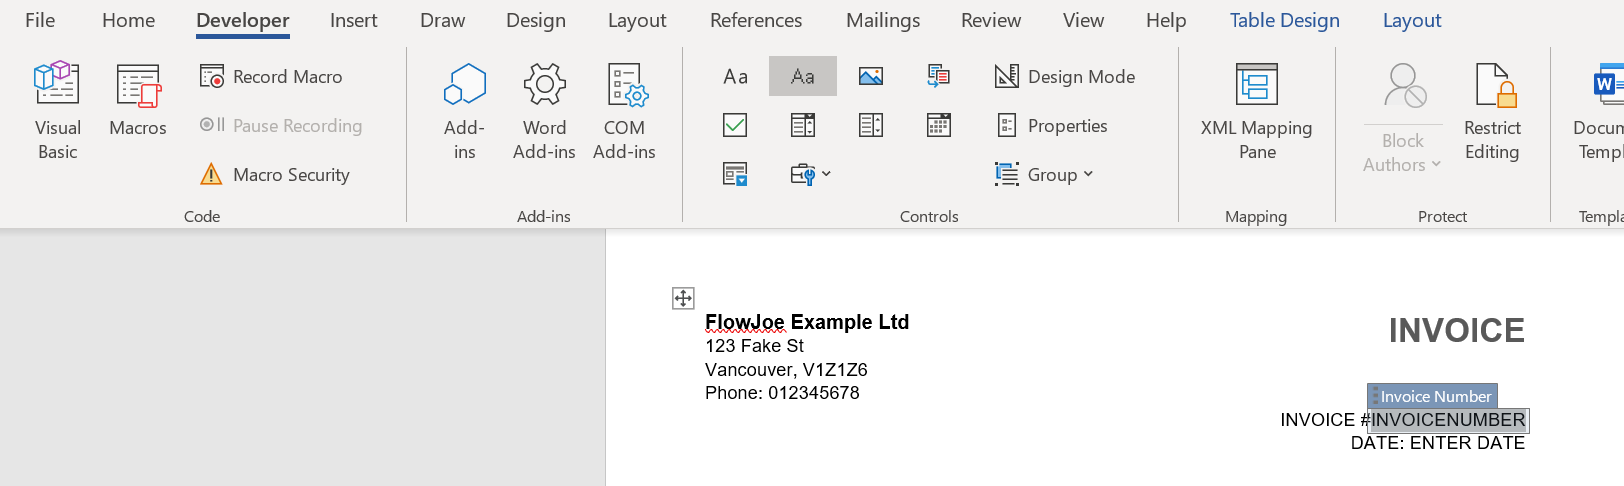 Word Control Highlight" width="1624" height="486" />
Once you have added a control in replace of some dummy-data (such as the invoice number shown above) you need to click ‘Properties’ in the Developer > Controls section on your ribbon. This will allow use to assign a Title and Tag to this control. See below:
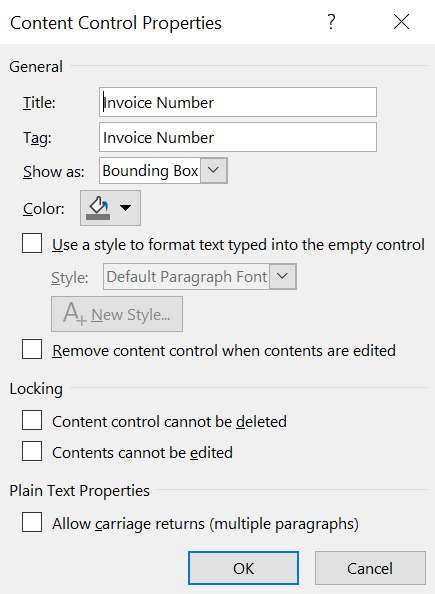
When opening this template in Power Automate it will provide us with an option to pass data into this tag. We’re effectively naming parameters on our template in preparation for us opening this template in Power Automate. Add all of these controls and name appropriately until you’re finished. If you’re adding multiple items then name them, for example, Item1, Item2 so you know what they represent when in your Flow.

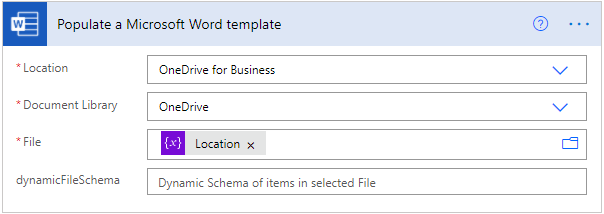
We need to add the ‘Populate a Microsoft Word template’ action to our Flow. Now, this is where things can fall apart easily. If we’re just using the same document to populate each time, then we can simply select the Location, Document Library and File. This will then give us a list of fields to populate.
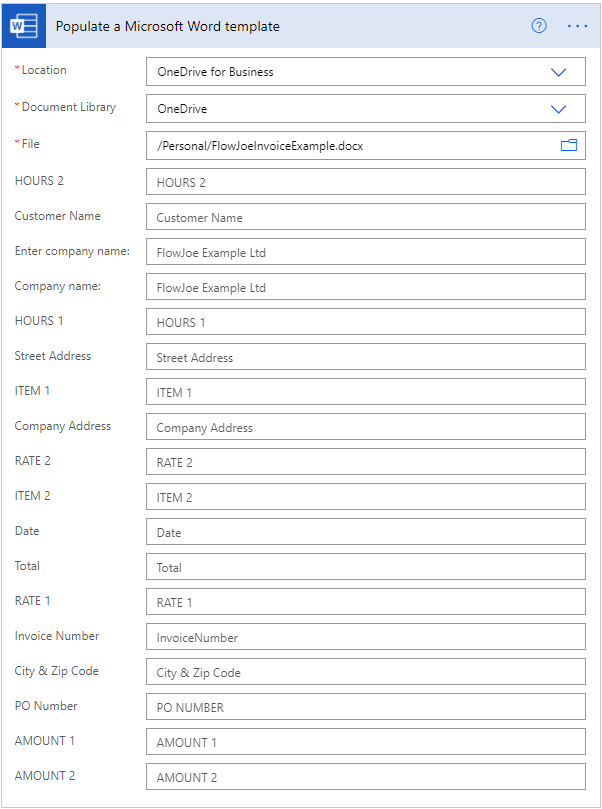
With this approach we can simply add the dynamic or static values into the fields and we’re populating the template, however, if we’re dynamically passing in the Word document we need to use the Dynamic File Schema approach. This approach is in a seperate section.
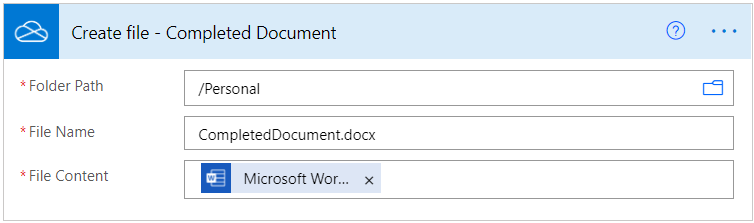
Now, once we have populated our values, we can simply create the file with the contents of the output from our Populate a Microsoft Word template action.
This approach requires us to use XML/XPath to target the id of the field and populate it. The problem is that the ID’s can easily change if they’re not always the same document, so we need a way of retrieving these ID’s.
If you pass the location in dynamically you will end up with a view like this:
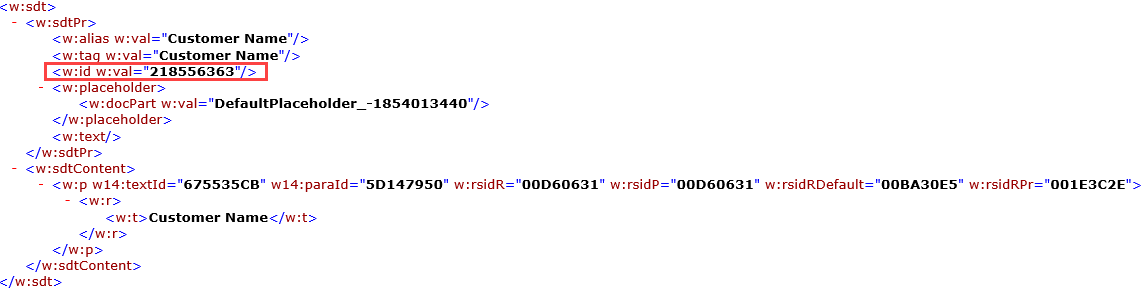
The dynamicFileSchema is where you will populate the template, however, you need to get the ID’s for this. To do so, you need the XML of the document.
Firstly, save a copy of your Word Document, change the file type to .zip and then extract the contents. This will provide you with all of the documents used to make the Word Document. You then need to open the folder, then the ‘word’ folder and then open the document.xml file.
Now you have the XML document open you can find the ID for the item you’re looking to populate, the example below shows you the ID we would need to populate the Customer Name on the invoice.
We can now populate the dynamicFileSchema with the ID and the information we want to pass through. A high level look at the code we will pass will be similar to:
An actual example for our Customer Name field will look like:
This will target the field via the ID and pass “FlowJoe” into the customer name.
The final result will look something like this:
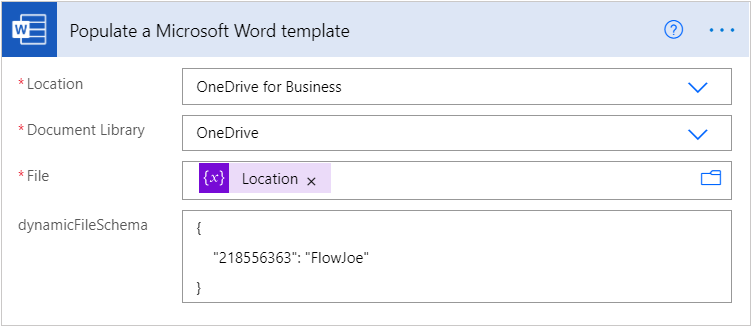
You can obviously replace “FlowJoe” with the dynamic data of your choice.
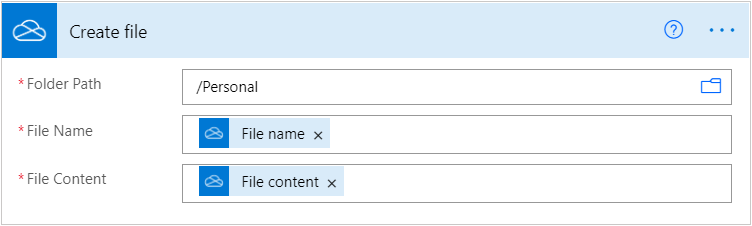
From here you can create a populated word document using the Create File (or the SharePoint alternative) and pass the file contents through from the Populate a Microsoft Word template action.

This will NOT work for documents that are generated as a template as the ID’s will continue to change, To handle this you will need to open the XML document on Power Automate and create a flow that extracts the ID based on the alias.
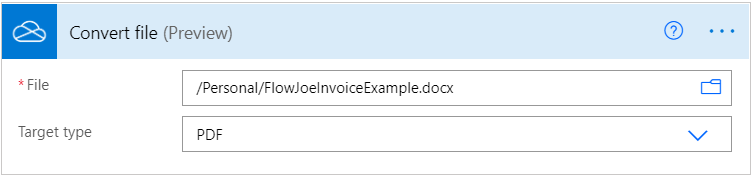
To generate a PDF from the Word Template, you can simply save your document into your desired location to generate the populated word document and then use the Convert File action while Selecting PDF and use the outputs in the Create File (OneDrive)/Create Item (SharePoint).
Here’s an example if we were to use the Convert file action:
File Name: outputs(‘Convert_file’)[‘headers’][‘x-ms-file-name’]
File Content: body(‘Convert_file’)
Learn about how to create Copilots using the new Microsoft Copilot Studio: Getting Started with Microsoft Copilot Studio | An Introduction